This tutorial describes how to install the Eclipse oxygen-based Camel editor.
- install the Eclipse – oxygen version, for example “Eclipse IDE for JAVA Developers version” (follow instructions on: http://www.eclipse.org/downloads/download.php?file=/technology/epp/downloads/release/oxygen/3a/)
- inside the Eclipse, choose help-> install new software (you can search for a given plugin, tick, then search the next one, tick, and so on)
- choose Oxygen – http://download.eclipse.org/releases/oxygen
- choose the following plugins:
- EMF – Eclipse Modeling Framework SDK 2.13.0.v20170609-0928
- EMF Parsley CDO 1.2.3.v20180220-1246
- OCL Classic SDK: Ecore/UML Parsers,Evaluator,Edit 5.3.0.v20170607-1133
- install more plugins:
- OCL Examples and Editors SDK 6.3.0.v20170613-1432
- Xtext Complete SDK 2.12.0.v20170519-1412
- and more:
- CDO Model Repository SDK 4.6.0.v20170602-1611
- Download camel folder from Bitbucket (branch: rc2.5): https://bitbucket.7bulls.eu/projects/MEL/repos/camel/browse/camel?at=refs%2Fheads%2Frc2.5
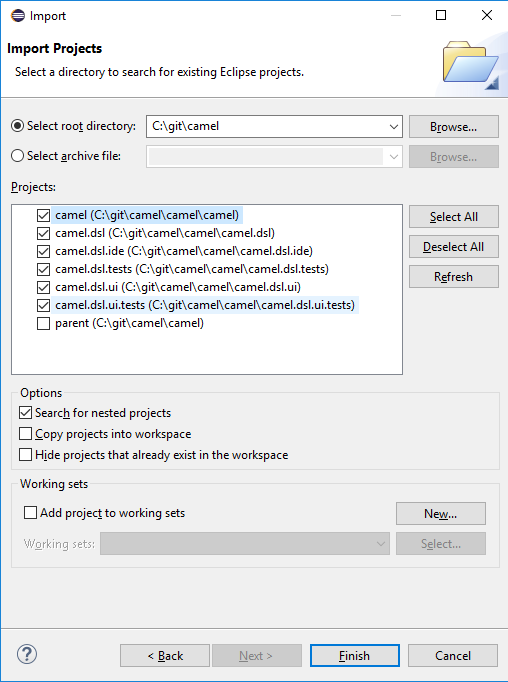
- Import camel projects into the eclipse workspace. (File → Import…, you should see the same window as on the screenshot below)
- Select camel/camel directory (the camel project directory under the camel git directory)
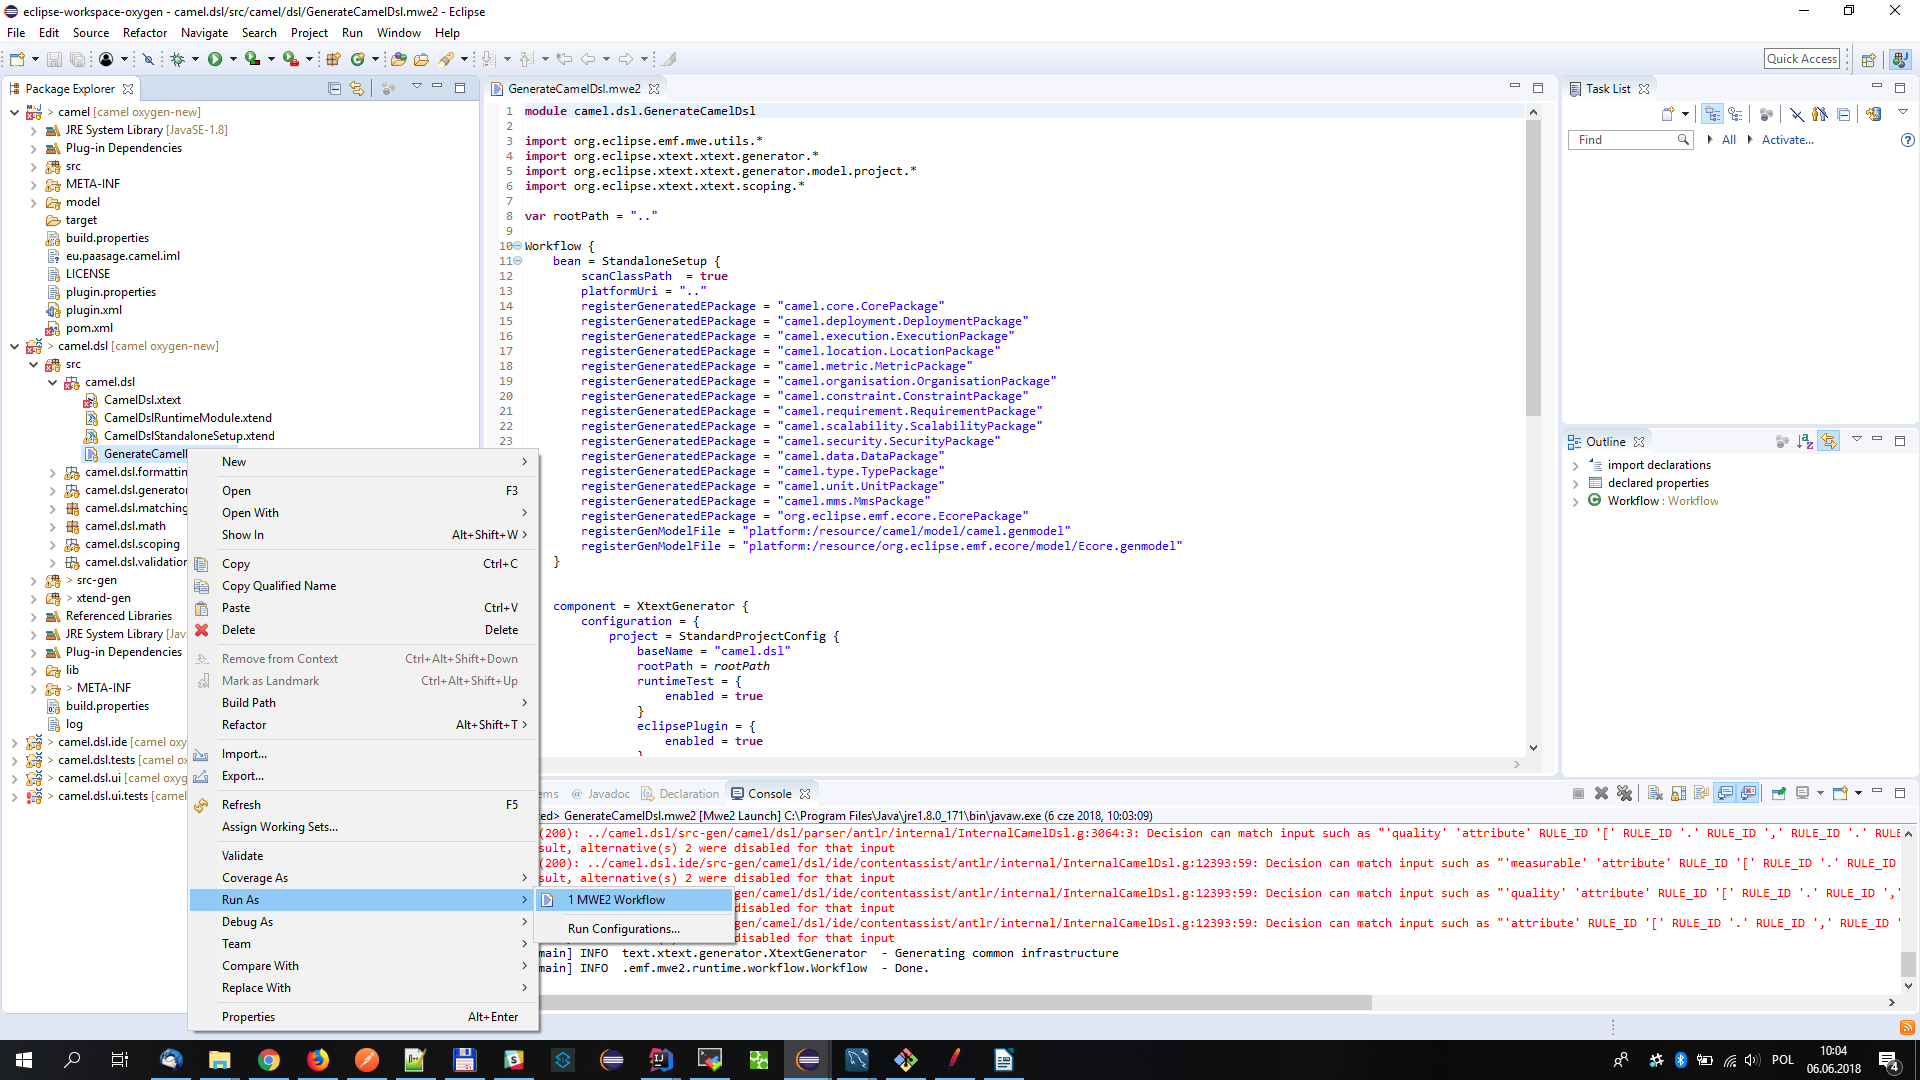
- generate mwe2 flow (right-click on GenerateCamelDsl.mwe2 under src/camel/dsl and then runas->MWE2 workflow)
Running the textual editor:
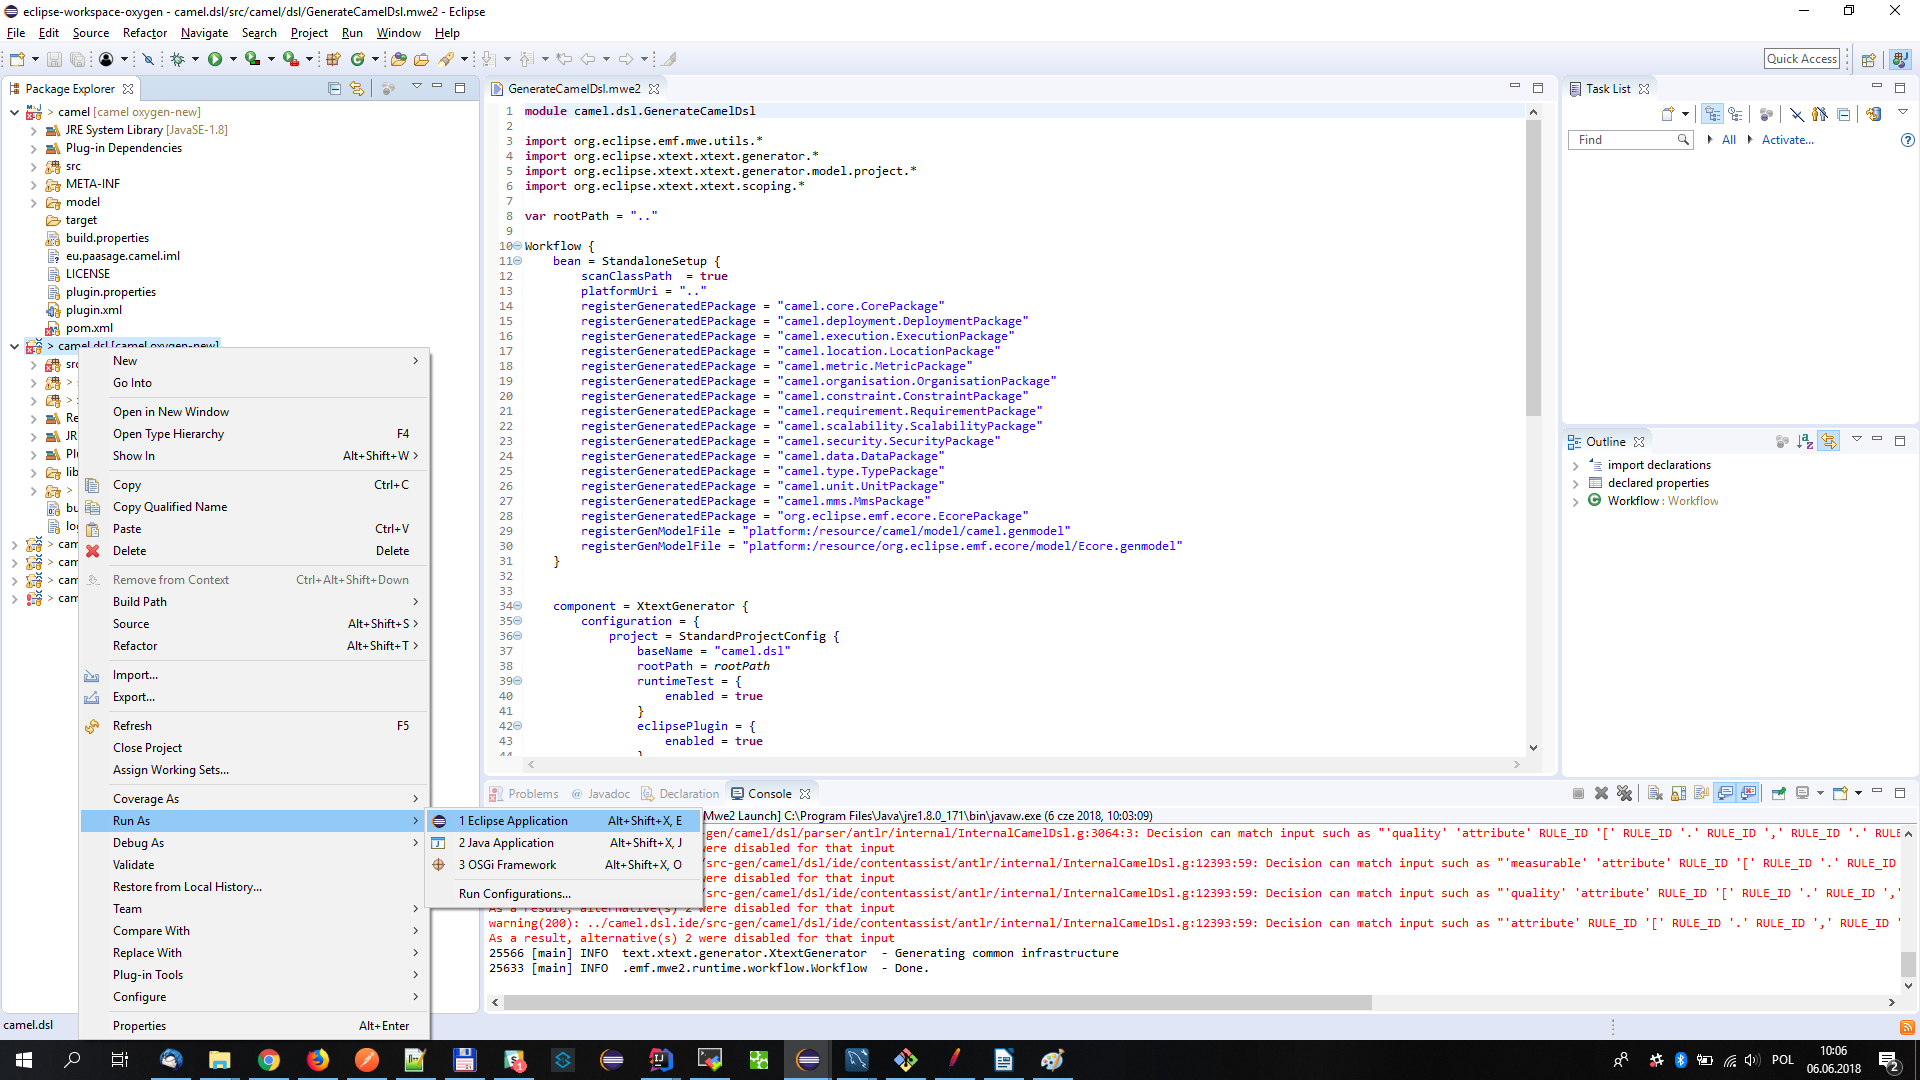
- right-click on camel.dsl project and runas -> eclipse application
- create general project (just once) and put .camel files inside
- copy MMS.camel, location.camel, metric.camel & unit.camel files (from camel repository->examples) to the workspace (this enables to insert meta-data-schema annotations in the CAMEL model as well as re-use metric, unit & value type elements from the three latter template models)
- open camel file (for the first time it will ask to enable xtext nature – just agree and remember the decision)
- after editing and saving .camel file the .xmi file should be generated under src-gen folder
Alternative Execution
Once the first execution alternative is followed, you can open the Debug view (Window→Show View→Other→Debug→Debug).
There, in the opened view, you actually see the command that is being executed. You can just right click on it and select Properties.
This will unveil the actual command string. You can then just copy and paste it, e.g., in a certain executable file like run.bat for Windows.
Then, you can just stop the previous execution and use the respective executable file to launch the editor from now on without having to run a priori any (graphical) Eclipse Environment.
This can certainly enable to save a lot of main memory space.
Note: this command is workspace-specific so this is the reason that requires first to create the right workspace and have the right Eclipse plugins installed as well as the CAMEL ones.